
# Hose controls
Hoses are flexible and their controls are located on the end controller (foot, hand, etc) because this is the layer you will interact with the most while animating.
Each new hose is created with the values from the Settings area. Adjusting these values will adjust all new hoses created.
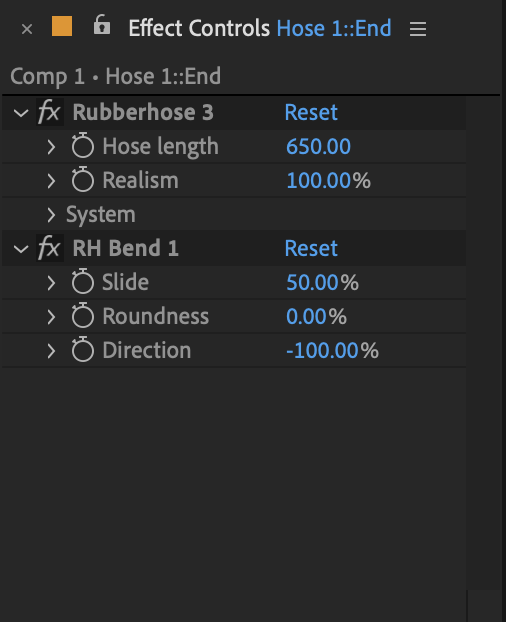
The controls are split into 2 pseudo effects:
- Rubberhose 3 defines the way a hose bends
- RH Bend defines the characteristics of each bend point
This separation between controls for the hose and bend allows you duplicate the bend effect to create additional bends. This is also possible with the Add bend button.
# Hose length
The most fundamental element of a hose is its length. This value defines the pixel distance between the controllers at which the hose will be pulled straight.
A hose may be stretched beyond this Hose length value (you will notice the controllers change color when this happens), but when the distance between controllers is less than the Hose length value, the hose will bend.
# Realism
Animators familiar with Inverse Kinematics (opens new window) will recognize the sharp snap that happens when a limb goes from bent to straight. This is mathematically accurate, but animation isn’t always about accuracy.
When Realism is at 100% it a hose will behave similar to a snappy IK rig. Decreasing Realism will introduce softness to how the hose straightens out. Something between these extremes is recommended, so dial in your own concept of reality.
# Slide
Each bend point is capable of sliding between the controller layers.
- 50% is the exact center between the controllers
- Moving toward 0% will move the bend closer to the start controller
- Moving toward 100% will move the bend closer to the end controller
There is an underlying curve to how the bend point moves between controllers to create a more natural shape when sliding bend points. See Autoflop to explore more foreshortening and limb segment overlapping.
# Roundness
Bend point roundness works like a path’s tangent handle. Increasing its value softens the bend by extending its tangent handles.
- 0% creates a sharp bend
- 100% creates a soft/smooth bend
Keep in mind that each bend point may have a different roundness value and that Hoses are capable of transitioning from curved to straight bends as needed. This opens up a lot of stylistic possibility so have fun.
Why doesn’t Roundness affect RubberRig?
The stretchy bones system behind RubberRig places bone layers between the bend points. Bones stretch as a hose stretches but they are still straight lines and are unaware of each point’s tangent handles.
# Direction
A hose bends when the distance between controllers is less than the Hose length value but the way it bends is defined by direction.
Experiment with keyframing direction and setting the value to less than 100% for different looks. This can create an appearance of depth as if the hose is bending toward or away from the camera.
Multi-bend tip
Use a value lower than +/- 100% when utilizing multiple bends that cross from positive to negative (an S-curve). It ends up looking a little more natural than bend points at their extreme.