
# Export presets (Premiere)
Before compressing, Anubis will export the highest quality possible. A Premiere timeline contains some hidden elements and additional options that may only be unlocked by selecting an Export Preset.
Some common options that do not come with the default renderer:
- Burn Timecode
- Export a Sidecar SRT
- Use Previews
Download EPRs for these common options
# Adding an export preset to Anubis
To keep the interface clean there will be no Export preset selection until you add additional preset files.
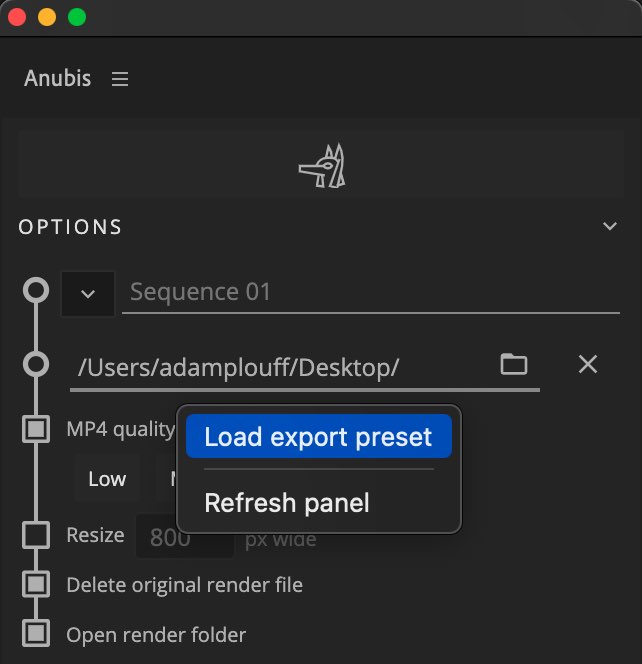
Right click the Anubis panel in Premiere and select Load Export Preset. A Finder or File Explorer window will open to a system folder ../BattleAxe/Anubis/Premiere presets/. Copy EPR files into this folder.
Refresh Anubis and you will now see a dropdown for Export preset.
# Creating an export preset
# Import Standard preset (optional)
- Download Anubis-Standard.epr.zip
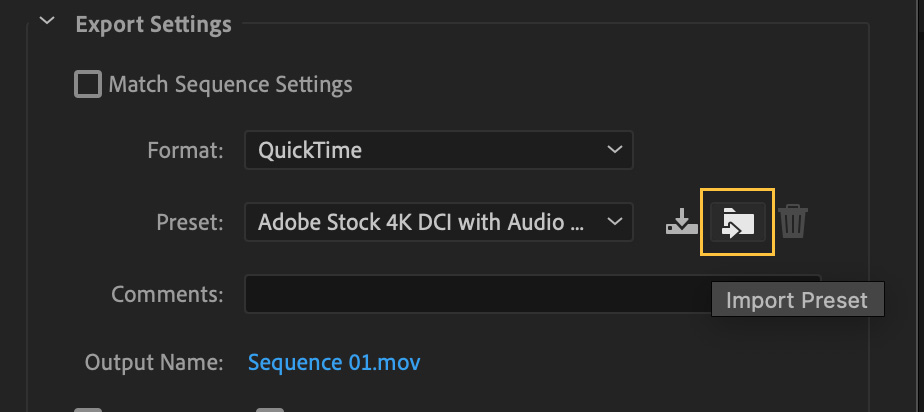
- Within Premiere, open the Export Settings panel (File > Export > Media)
- Click the
→📁icon to import the newly downloaded Anubis-Standard.epr file - Or just start fresh by selecting Prores 422 HQ MOV with Match Source enabled for video.
# Customize the preset
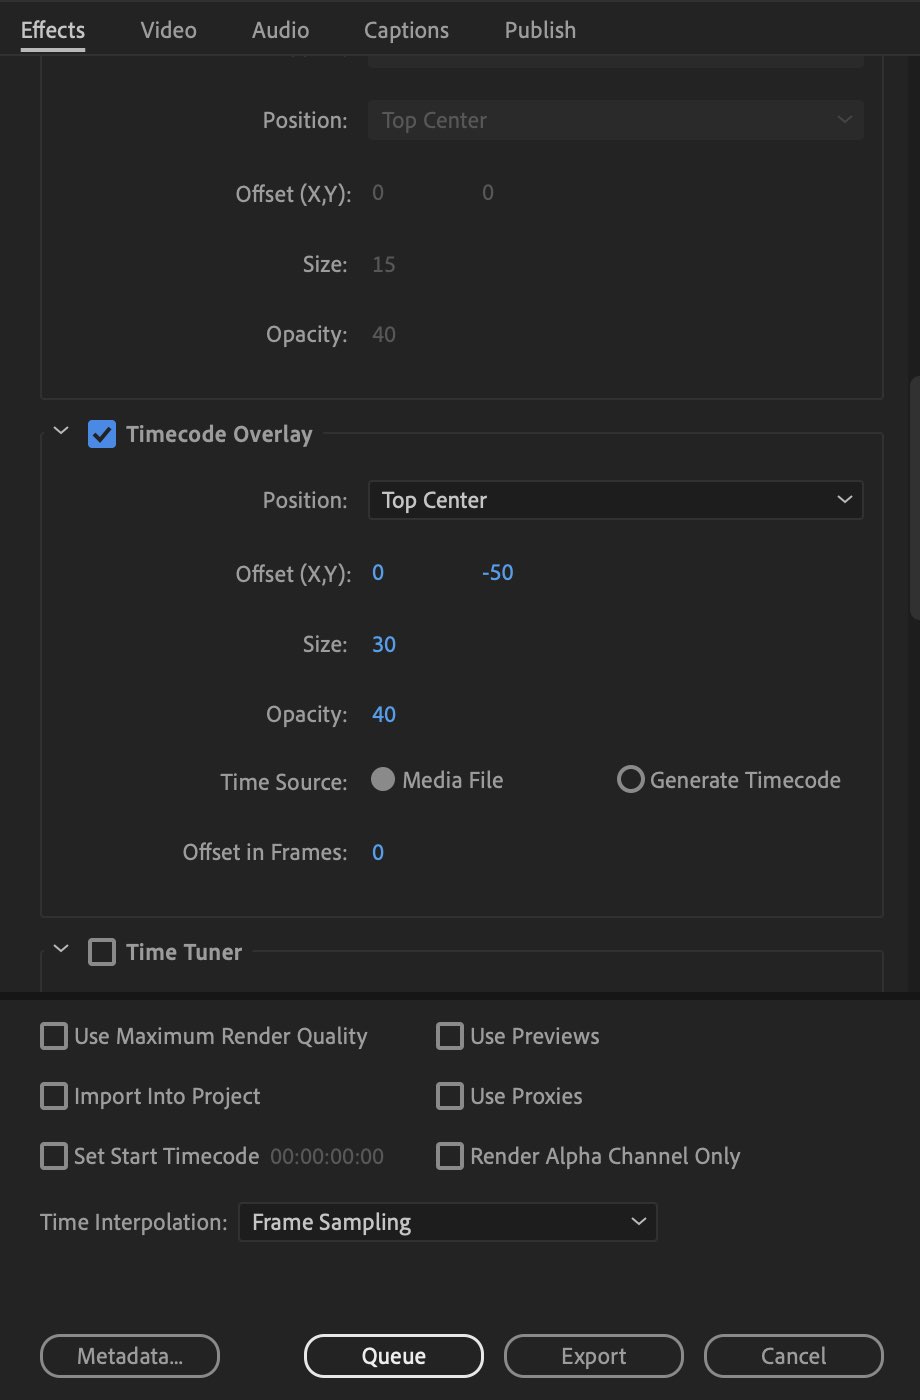
Enable additional options and customize the display effects to make the video exports match your preferences.
Anything from the Effects, Video, Audio, and quality options below are available to edit.
# Save the preset
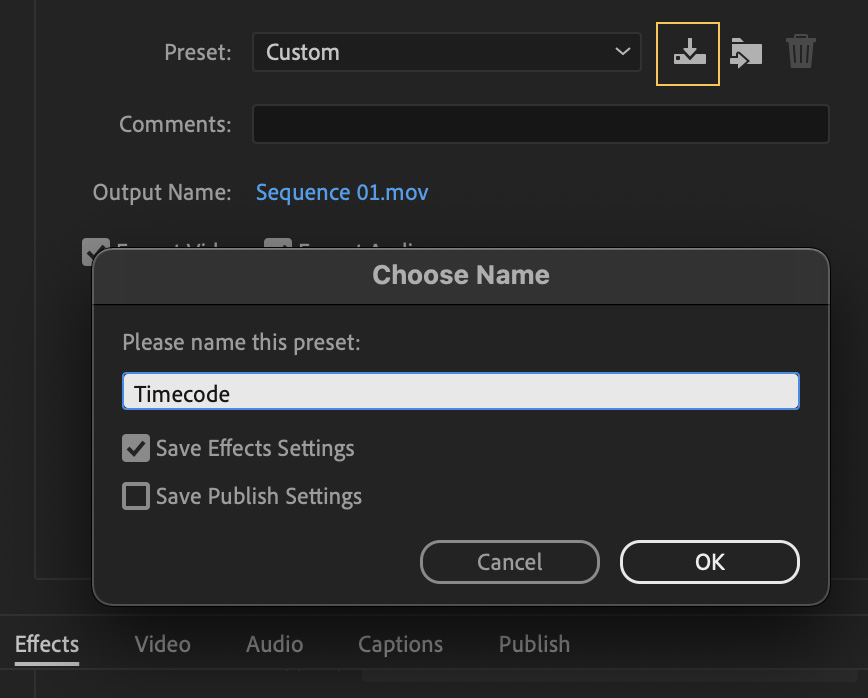
- Click the
⬇️icon to Save Preset - Enter a name
- If you enabled effect overlays, be sure the ☑️ for Save Effects Settings
- Locate the new EPR file in the Adobe Media Encoder presets folder
- Copy the new file into the Anubis presets folder
- Right-click the Anubis panel to refresh and update the Export preset list
Adobe Media Encoder presets folder location
Mac: /Users/**username**/Documents/Adobe/Adobe Media Encoder/22.0/Presets/Metadata/
Windows: C:/Users/**username**/Documents/Adobe/Adobe Media Encoder/22.0/Presets/Metadata/