
# Workflow
# Brief history
Way back in 2015 only a smaller number options existed for character rigging in After Effects. As if millions of voices suddenly cried out in terror for a bendy line that worked how you imagined it would, RubberHose was born. Birthed from dreams and much trigonometry.
Time has passed and a new Hose is here. One that learned a lot from the original and is stronger and wiser than before.
# RubberHose
Learning to work with hoses is easier done than read. Check out the tutorial project or some of the tutorial videos.
A single click will create a customizable bendy line. A Hose consists of a Hose layer and two controllers (Start and End). The End Controller (Wrist, Ankle, or End) is typically furthest from the body and is animated most.
# Controls
Select the End Controller and press F3 to open the Effects panel to adjust the properties of the hose and take control of how it bends.
- Hose Length
- Bend Radius
- Realism
- Bend Direction
- Controller Auto Rotate
For a more detailed look at each control, read up on the Controls page.
# Settings
The more you use RubberHose the more of your own style you'll discover.
Maybe you always turn up the Realism, maybe you like a lower Bend Radius, maybe you work at a smaller resolution and wish controllers could be smaller. To save yourself some time updating hoses every time you build, you can dial in your hose settings under the Manage group.
# RubberRig
# Creation
Create 2 layers in After Effects or import from Illustrator and Photoshop or anywhere.
- Turn on the Title Safe grid with the quote key ( " is to the left of Return)
- Align the connection point of the two layers at the center of the comp
- Select the first layer of the chain (typically the upper leg or arm)
- Select the end layer of the chain (typically the lower leg or arm)
- Press the New RubberRig button.
The art layers will be connected to a new set of controllers that function like the stretchable RubberHose controls you know and love.
# Stretching
Stretchiness is a big part layer rigging with RubberHose. Each layer's length is defined by the Segment Length control in the layer's Effect panel (F3). Dial this in to the correct length if it's not exactly right after creation.
Some limb segments are longer than others and this length difference can be adjusted with the Center Bias control on the Center controller's Effect Panel.
# Alignment
Depending on how your art was created or aligned the automatic setup might not be 100% perfect. Use each layer's Rotation property to align its end to the corresponding controller. Use the layer's Anchor Point property to align where it joins the other layer.
# Glitch: backward rig
If your rig creation produces some kind of weird, inside-out rotation, it's probably because of the order in which you selected the layers. Be sure you select the top-most layer first (upper arm/leg) then the lower layer before creating the rig.
Select layers in the right order or embrace the weird looking.
# RubberPin

If your idea is too complex for shape layers in RubberHose and the art needs that smoooooooth bend (unlike RubberRig), it's time for Puppet Pins. Loved and hated by many, it's now painless to connect a set of 3 pins and control them as easy as a hose and stretchable like all rigging methods.
One unique feature of RubberPin is the ability to use multiple controller/pin groups on a single layer. Yep, go crazy.
# Setting pins
RubberPin rigs are created by connecting the individual pin points to controller layers.
NOTE Pins are sorted from comp top to bottom (rather than based on creation order or selection order). So avoid arms that go straight out horizontally or bend upward. Put at least a slight downward angle on those limbs.
- Using the PuppetPin tool (CTRL/CMD+P) add 3 pins to a layer –this adds keyframes at the same time
- Press U on the keyboard to reveal these new keyframes
- Select these 3 new keyframes (or the properties themselves)
- Click the button
- A set of controllers will be created and expressions added to the pin properties
- A fourth control will be created as a parent for the art layer and the end controllers*. Use this to scale, position and rotate the whole group
*the center controller should remain un-parented for correct positioning.
# Bend radius
By default, Puppet Pins bend pretty smooth but it would be nice to customize the quality of a bend like Bend Radius on a hose. Unfortunately, that's not how pins work. Along with Pins you may also add Starch points. This allows a layer to be straightened in areas and curved in others.
Play around with adding Starch near the end controllers or varying the Amount of a Starch point in the center. It opens up a new level of customization.
# Linking pins to a hose
Adding tattoos or complex texture to a hose is easy by linking a set of pins to an existing controller rig group (this also keeps layer count to a minimum).
- Select 3 pins (like normal)
- Then select a controller from the group to link to
- ALT+Click the new RubberPin button
At this point you can set the pinned layer to preserve transparency or the original hose may be duplicated (CMD/CTRL+D) and used as a track matte to mask the alpha of the pinned layer.
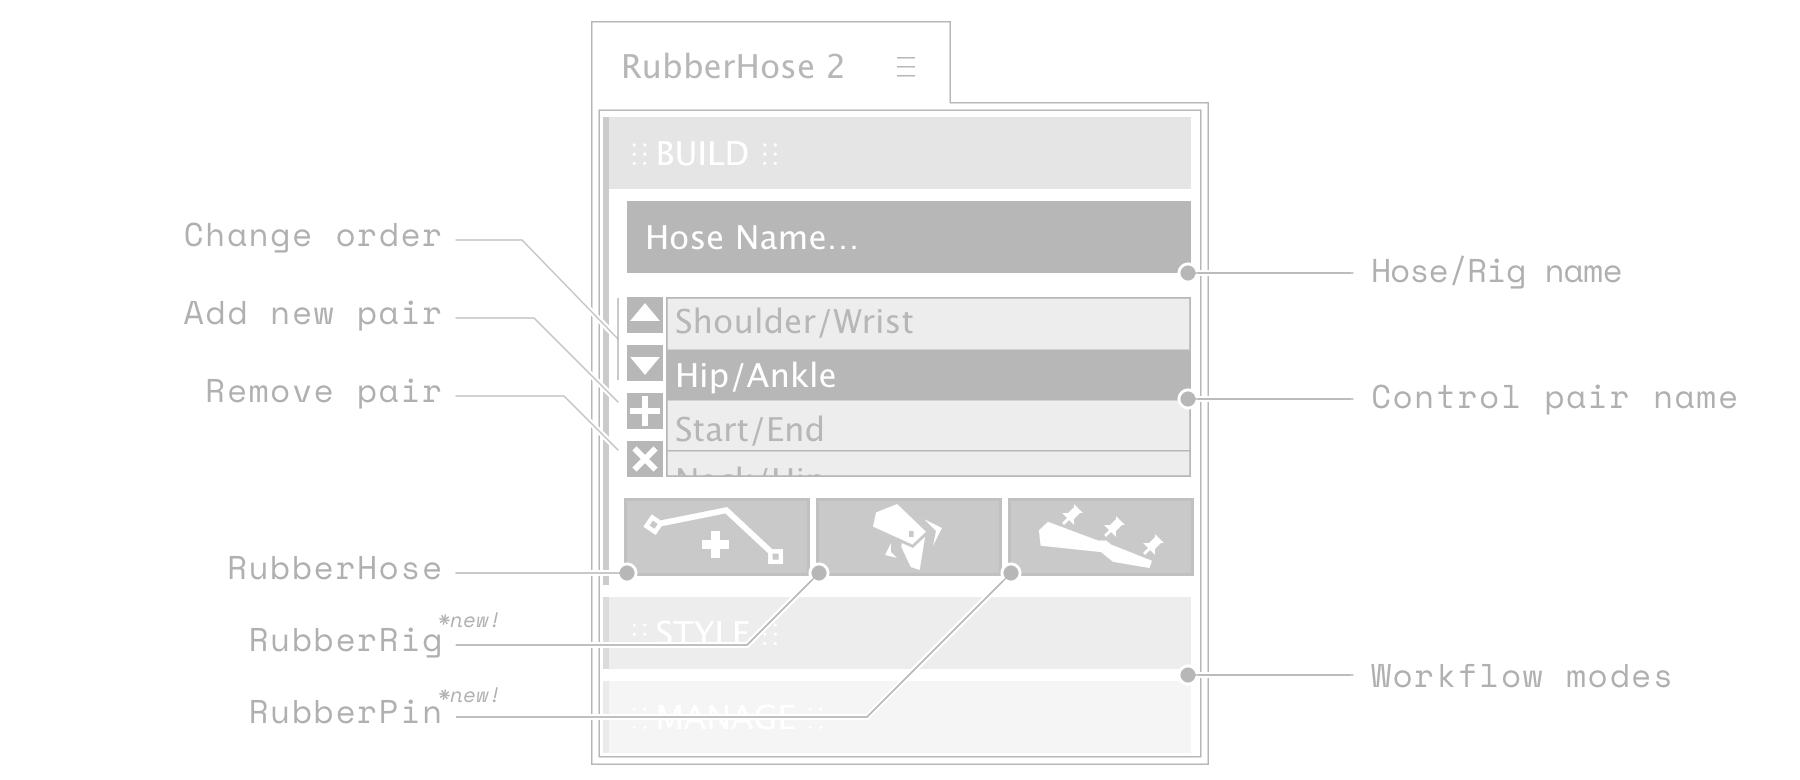
# Controller naming
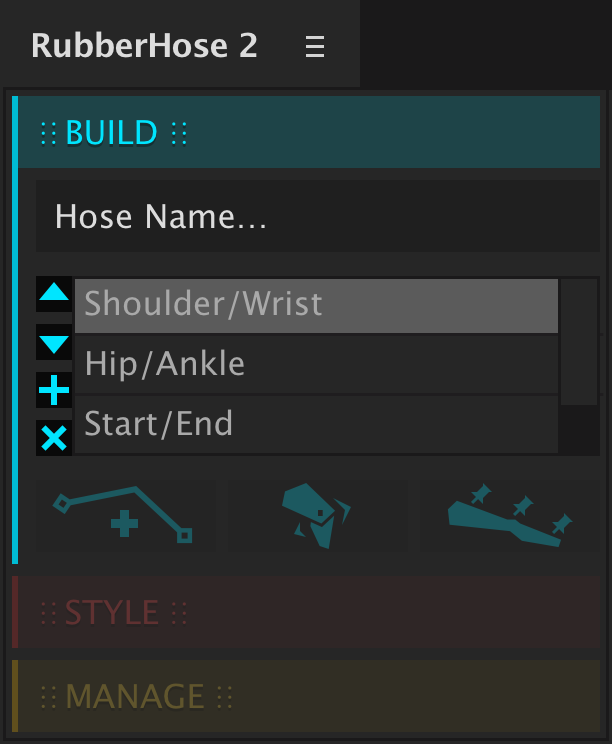
No matter how you rig, everything built using RubberHose needs a name. Each new rig group will be named based on Hose Name… field and the controller pairs selector. Controller pairs are reused as characters typically have the same kinds of parts (arms, legs, necks). Each time a hose or rigging group is created the name must be manually renamed, or it will be automatically incremented. This gives groups a unique name and avoids expressions targeting the wrong layers.
Controller pairs may be rearranged, added and deleted in the list view to best suit your workflow.
← Getting started Style →