# Beatgrid
Based on a brilliant idea for a BPM grid overlay (opens new window) inside of Ae's timeline by Sander Van Dijk (opens new window). Not nearly as integrated as a native solution, Beatgrid does provide enough to synchronize elements to 4/4 beats with markers and keyframes.
A newsletter? Ew.
We write a blog of workflow tips, ideas, development stories, and product updates. When we publish these posts it sends out an email. Your inbox is the inner sanctum of your digital life and the last thing we would want to do is spam you or sell your info.
Unsubscribe at any time.
# Usage

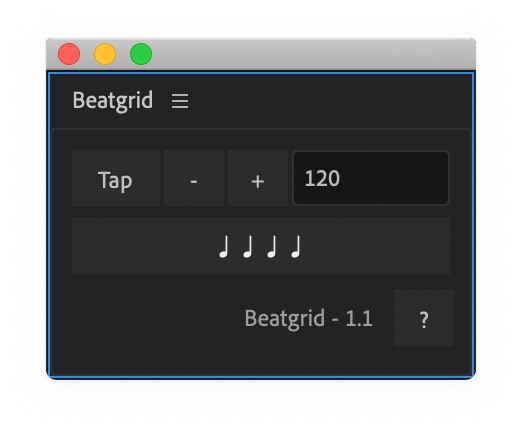
Controls are simple: Tap the tempo, -/+ buttons to decrease/increase or type in the BPM if you know it. Click the ♩ ♩ ♩ ♩ button to create time markers.
An empty shape layer will be created with markers and keyframes in time with the tempo. Marker 1 (at the start of the timeline) starts the first measure. The next marker will be labeled 5 to mark the 5th measure. Like what you see in music recording apps. This pattern continues until the end of the comp.

# Beat view
Pressing U on the keyboard will reveal a set of keyframes aligned to the beats. Keys on the Anchor Point will count the measures and keys on the Position will count quarter notes:
1, 2, 3, 4 - 2, 2, 3, 4 - 3, 2, 3, 4 - 4, 2, 3, 4

# FAQ
# Can I snap layers to time?
Select the Beatgrid layer and press U on the keyboard to reveal the individual beats. Hold the SHIFT key when dragging a layer's start, end, or keyframes to snap to the revealed Beatgrid keyframes. This is a behavior of Ae and can be useful for aligning elements to the music tempo as well as any other alignment needs.
# Are the markers and keys aligned to frame?
Nope. The point of this is to provide musical timing markers, and this means they will not always line up to your frame-rate. But that's ok. Using SHIFT to snap keys or layers will round to the nearest frame.
# Why not just have all the beats as markers on the layer?
Rather than destroy your timeline with markers or wreck the ability to use J/K keyboard shortcuts to navigate the timeline, there are multiple levels of detail. This is a choice for an extra step, but I prefer the ability to zoom out and see less musical detail. Similar to an audio DAW like Ableton, Audition, Logic.
# What's the point of all this?
When I start a project I will often have a target length in mind but I need to know what musical timing would fit based on the number of measures and how I want the music to progress or resolve through the piece. Whether you're writing music or searching for a track that will fit a project length, knowing a rough musical timing can be pretty helpful.
Please read this End User License Agreement (“EULA”) before you download and use Beatgrid.
By downloading and using Beatgrid, You agree, without reservation to be bound by the terms of this EULA. If You do not agree with the terms of this EULA, please do not purchase a License Key and/or download and use Beatgrid.
View EULA# Installation
├── 📂 Beatgrid
│   ├── 📂 KBar icon
│   │   │   └── Beatgrid.svg
│   ├──  Beatgrid help.html
│   ├──  Beatgrid.ffx
Dockable panel
CC2019+

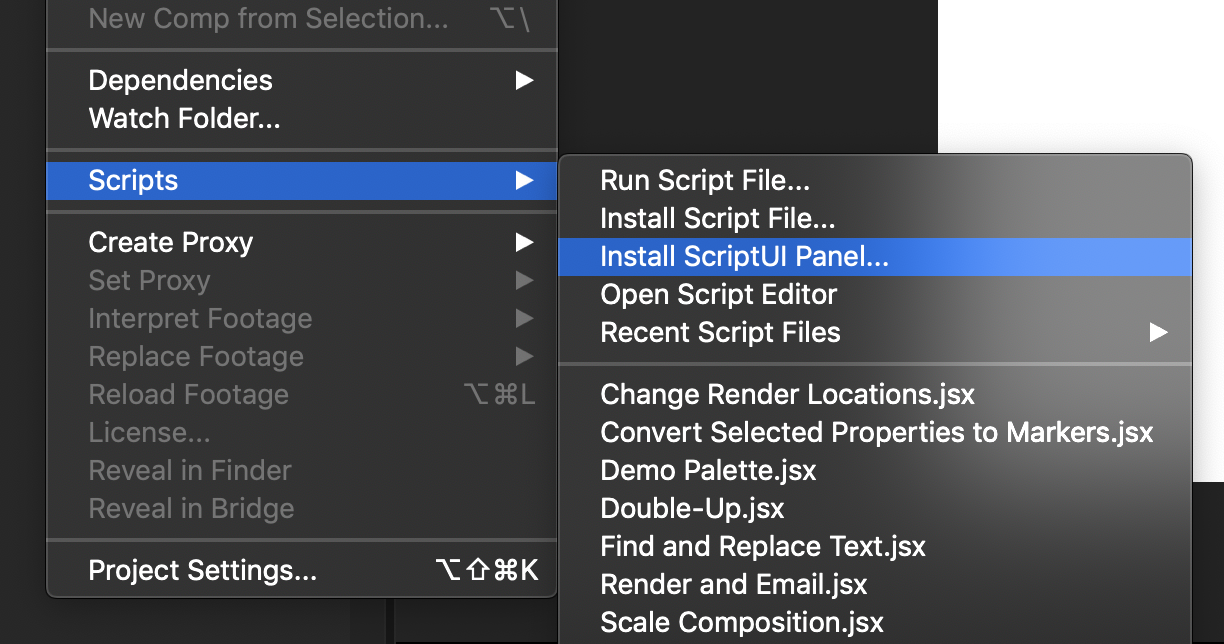
In newer versions of After Effects, it is possible to install Beatgrid and other scripts without digging through your hard drive.
File > Scripts > Install Script UI Panel…
Restart Ae and Beatgrid will be available in the Window menu at the top of the screen. Scroll down to find the installed scripts.
CC2018 and older

- Unzip the Beatgrid.zip download
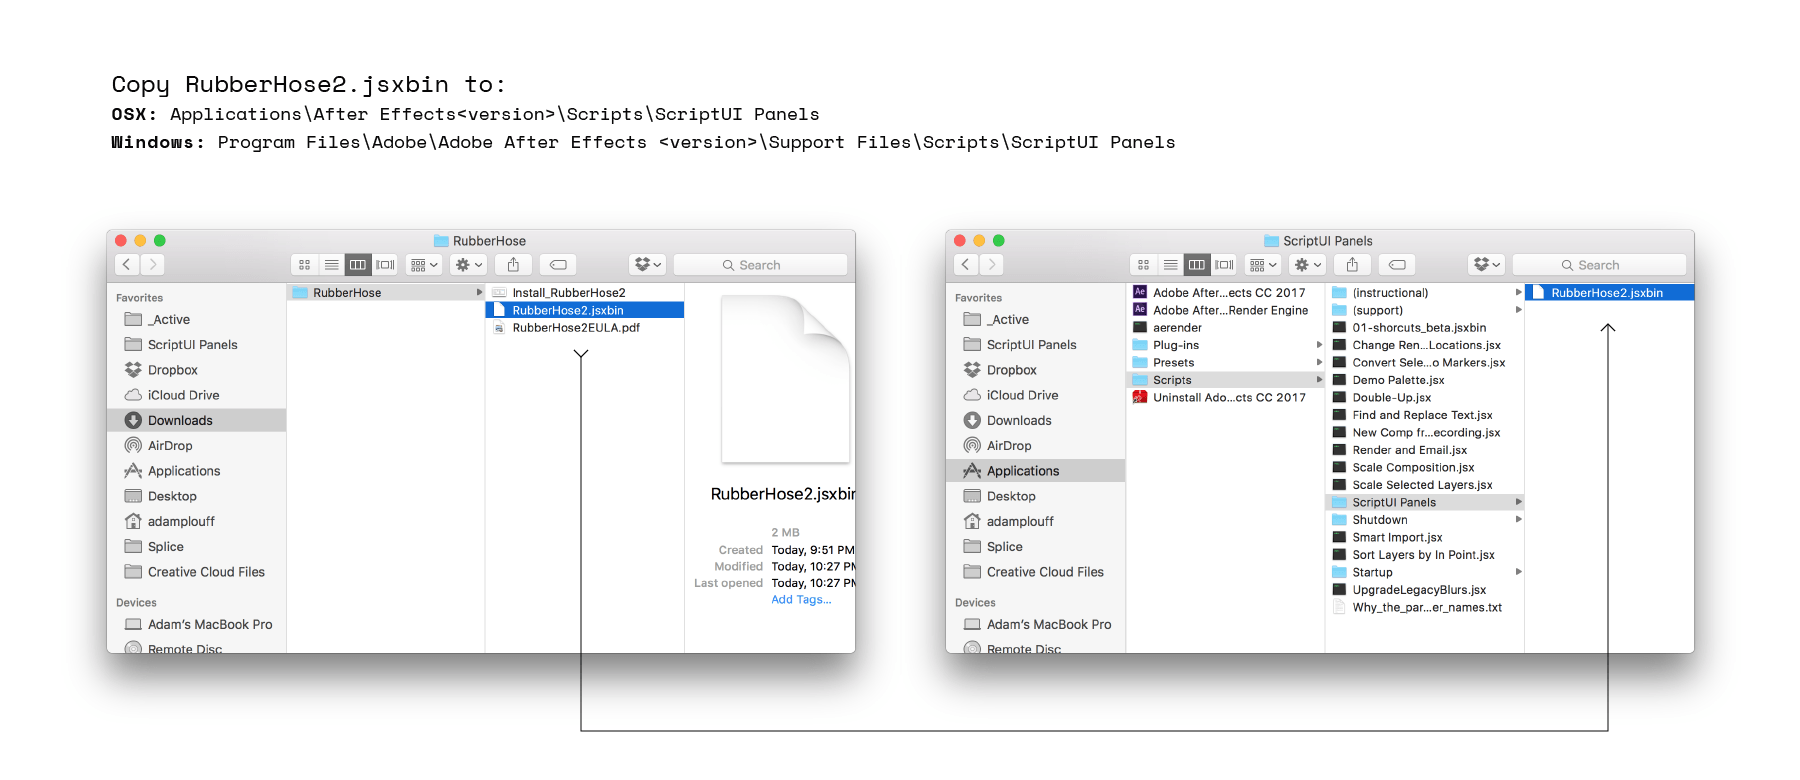
- Copy Beatgrid.jsx (or .jsxbin) to the ScriptUI Panels folder
- Restart After Effects
- Beatgrid will be available in the Window menu at the top of the screen. Scroll down to find the installed scripts.
Install paths
- OSX:
/Applications/After Effects #version#/Scripts/ScriptUI Panels/ - Windows:
/Program Files/Adobe/Adobe After Effects #version#/Support Files/Scripts/ScriptUI Panels/